Synchronize Cerb ticket data to Salesforce objects
- Introduction
- Configure the Salesforce service
- Create a new object in Salesforce
- Build Salesforce Bot in Cerb
- Test record synchronization
- Next steps
- References
Introduction
It's not uncommon for larger companies to use both Cerb and Salesforce for different teams. In this situation, executives often want to use Salesforce to handle all of the reporting.
In the past, a custom plugin was required to perform this synchronization. This was expensive, time-consuming, and complicated. The plugin had to be kept current with recent Cerb changes. If you needed to add new fields to the synchronization, the plugin needed to be modified by a developer and redeployed.
With the introduction of recurrent behaviors in Cerb 8.1, this process has been drastically simplified. You can now build a synchronization behavior entirely in your browser using bots. The behavior can be modified in real-time by anyone with the proper permission within Cerb. The behavior will also automatically be kept current with new versions of Cerb.
This guide will walk you through the process of creating a new custom object in Salesforce, and building a bot in Cerb to manage the ongoing synchronization of recently changed records. We'll send the first batch of ticket records to Salesforce and verify everything is working properly.
By the end of this guide, you should be capable of synchronizing any record data from Cerb into Salesforce. With minor changes, this same process will work for synchronizing data into any other service.
This guide assumes you're using Cerb 8.1 or later.
You may want to follow this guide in your Salesforce development sandbox before deploying the changes in production.
Configure the Salesforce service
Navigate to Search » Connected Services.
If you don't have a Salesforce service set up yet, you can configure one here.
Create a new object in Salesforce
Next, let's create the new object type in Salesforce for storing information about Cerb tickets.
Log into Salesforce
Log in to Salesforce from https://login.salesforce.com.
Create a new object for tickets
-
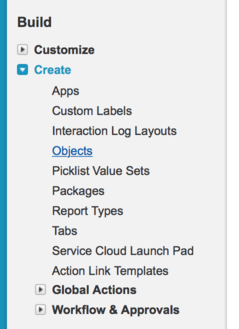
Click Setup in the top right.
-
In the Build menu on the left sidebar, expand Create and select Objects.
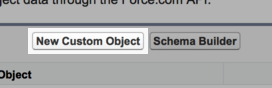
-
Click the New Custom Object button near the top middle of the page.
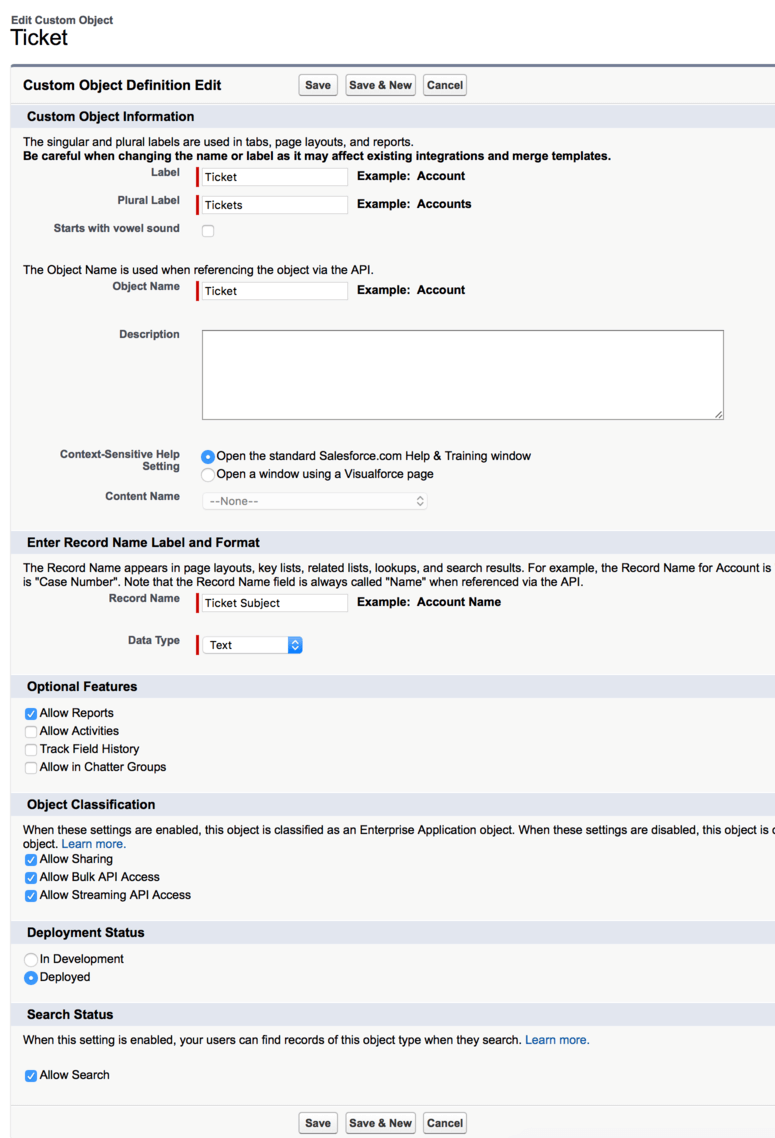
- In Custom Object Information:
- Label: Ticket
- Plural Label: Tickets
- Object Name: Ticket
- In Enter Record Name Label and Format:
- Record Name: Ticket Subject
- Data Type: Text
- In Optional Features:
- Enable Allow Reports
- In Object Classification:
- Enable Allow Sharing
- Enable Allow Bulk API Access
- Enable Allow Streaming API Access
- In Search Status:
- Enable Allow Search
- Click the Save button at the bottom of the page.
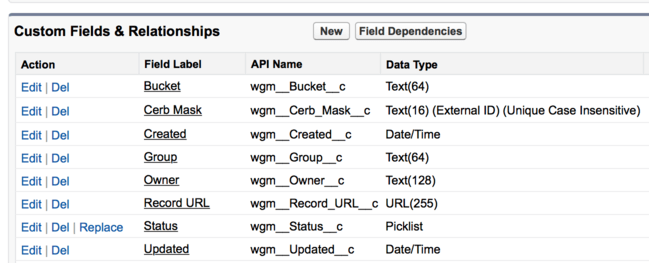
Add custom fields to the custom object
In the Custom Fields & Relationships section, click New to add custom fields.
Add custom fields for the data you want to copy from Cerb. This will vary depending on your reporting needs.
We recommend something like:
| Label | Data Type |
|---|---|
| Bucket | Text(64) |
| Cerb Mask | Text(16), External ID, Unique |
| Created | Date/Time |
| Group | Text(64) |
| Owner | Text(128) |
| Record URL | URL(255) |
| Status | Picklist: open, waiting, closed, deleted |
| Updated | Date/Time |
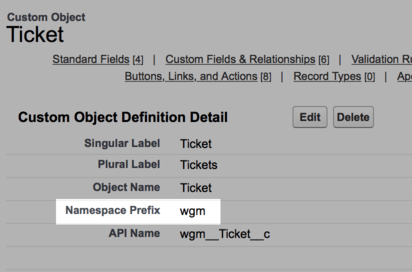
Write down the API names
Make a note of the Namespace Prefix for your custom object and custom fields. You'll be using these these in your Cerb bot.
Build Salesforce Bot in Cerb
Import the Salesforce Bot package (if necessary)
Import the Salesforce Bot package if you haven't already. If you're not sure, check the list on Search » Bots.
Modify the bot's global configuration
Navigate to Search » Bots and open the card for Salesforce Bot.
Click the Edit button at the top of the card.
Find your Salesforce API namespace. In Salesforce, this is the Namespace Prefix field on your custom record:
In the Configuration (JSON) section of Salesforce bot, add a key for "namespace" with the value from Salesforce. Be sure to add a comma to the end of the api_version line.
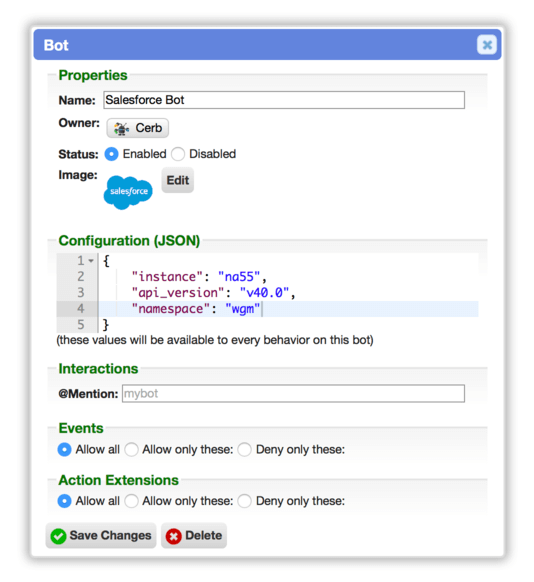
This will allow us to use the namespace in any of the bot's behaviors.
Click the Save Changes button to save the bot.
Import the recurrent behavior for ticket synchronization
We need a recurrent behavior to check for updated tickets in Cerb and send their metadata to Salesforce.
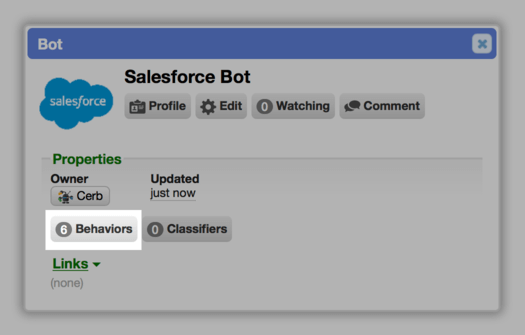
Click the Behaviors button on the card for Salesforce Bot.
Click the (+) icon in right of the blue bar above the worklist.

Switch to Import mode at the top.
Paste the following behavior into the large textbox:
{
  "behavior": {
    "uid": "behavior_salesforce_sync",
    "title": "Sync changed tickets into Salesforce",
    "is_disabled": true,
    "is_private": false,
    "priority": 50,
    "configure": [
      {
        "label": "Salesforce Account:",
        "path": "behavior.nodes[2].nodes[0].params.actions[0].auth_connected_account_id",
        "type": "chooser",
        "params": {
          "context": "cerberusweb.contexts.connected_account",
          "query": "service:\"wgm.salesforce.service.provider\"",
          "single": true
        }
      }
    ],
    "event": {
      "key": "event.behavior.recurrent",
      "label": "Recurrent behavior",
      "params": {
        "repeat_patterns": "# https://en.wikipedia.org/wiki/Cron#CRON_expression\r\n# [min] [hour] [dom] [month] [dow]\r\n*/10 * * * *",
        "timezone": "America/Los_Angeles",
        "repeat_history": [],
        "repeat_run_at": 1504311300
      }
    },
    "variables": {
      "var_changed_tickets": {
        "key": "var_changed_tickets",
        "label": "Changed Tickets",
        "type": "ctx_cerberusweb.contexts.ticket",
        "is_private": "1",
        "params": []
      }
    },
    "nodes": [
      {
        "type": "action",
        "title": "Load sync variables",
        "status": "live",
        "params": {
          "actions": [
            {
              "action": "_get_key",
              "key": "sync_json",
              "var": "_sync_json"
            },
            {
              "action": "_set_custom_var",
              "value": "{{_sync_json|json_pretty}}",
              "format": "json",
              "is_simulator_only": "0",
              "var": "_sync_json"
            },
            {
              "action": "_set_custom_var",
              "value": "{{_sync_json.since|default(0)}}",
              "format": "",
              "is_simulator_only": "0",
              "var": "sync_since"
            },
            {
              "action": "_set_custom_var",
              "value": "{{_sync_json.id|default(0)}}",
              "format": "",
              "is_simulator_only": "0",
              "var": "sync_id"
            }
          ]
        }
      },
      {
        "type": "action",
        "title": "Find changed tickets",
        "status": "live",
        "params": {
          "actions": [
            {
              "action": "var_changed_tickets",
              "search_mode": "quick_search",
              "quick_search": "((updated:\"{{sync_since}} to {{sync_since}}\" AND id:>{{sync_id}}) OR (updated:\"{{sync_since+1}} to now\")) sort:updated,id",
              "limit": "first",
              "limit_count": "25",
              "mode": "replace",
              "worklist_model": null
            }
          ]
        }
      },
      {
        "type": "loop",
        "title": "Loop changed tickets",
        "status": "live",
        "params": {
          "foreach_json": "{{var_changed_tickets|keys|json_encode}}",
          "as_placeholder": "changed_ticket_id"
        },
        "nodes": [
          {
           "type": "action",
           "title": "Upsert ticket",
           "status": "live",
           "params": {
               "actions": [
                   {
                       "action": "core.va.action.http_request",
                       "http_verb": "patch",
                       "http_url": "{% set changed_ticket = var_changed_tickets[changed_ticket_id] %}\r\n{% set ns = behavior_bot_config.namespace %}\r\nhttps://{{behavior_bot_config.instance}}.salesforce.com/services/data/{{behavior_bot_config.api_version}}/sobjects/{{ns}}__Ticket__c/{{ns}}__Cerb_Mask__c/{{changed_ticket.mask}}",
                       "http_headers": "Content-Type: application/json",
                       "http_body": "{% set changed_ticket = var_changed_tickets[changed_ticket_id] %}\r\n{% set ns = behavior_bot_config.namespace %}\r\n{% set json = {} %}\r\n{% set json = dict_set(json, 'Name', changed_ticket.subject) %}\r\n{% set json = dict_set(json, ns ~ \"__Bucket__c\", changed_ticket.bucket__label) %}\r\n{% set json = dict_set(json, ns ~ \"__Created__c\", changed_ticket.created|date('r')) %}\r\n{% set json = dict_set(json, ns ~ \"__Group__c\", changed_ticket.group__label) %}\r\n{% set json = dict_set(json, ns ~ \"__Owner__c\", changed_ticket.owner__label) %}\r\n{% set json = dict_set(json, ns ~ \"__Record_URL__c\", changed_ticket.url) %}\r\n{% set json = dict_set(json, ns ~ \"__Status__c\", changed_ticket.status) %}\r\n{% set json = dict_set(json, ns ~ \"__Updated__c\", changed_ticket.updated|date('r')) %}\r\n{{json|json_encode|json_pretty}}",
                       "auth": "connected_account",
                       "auth_connected_account_id": "10",
                       "options": {
                           "raw_response_body": "1"
                       },
                       "run_in_simulator": "1",
                       "response_placeholder": "_http_response"
                   },
                   {
                       "action": "_set_custom_var",
                       "value": "{{_http_response.body}}",
                       "format": "",
                       "is_simulator_only": "0",
                       "var": "response"
                   }
               ]
           }
          },
          {
            "type": "action",
            "title": "Update sync variables",
            "status": "live",
            "params": {
              "actions": [
                {
                  "action": "_set_custom_var",
                  "value": "{% set changed_ticket = var_changed_tickets[changed_ticket_id] %}\r\n{{changed_ticket.updated|default(0)}}",
                  "format": "",
                  "is_simulator_only": "0",
                  "var": "sync_since"
                },
                {
                  "action": "_set_custom_var",
                  "value": "{% set changed_ticket = var_changed_tickets[changed_ticket_id] %}\r\n{{changed_ticket.id|default(0)}}",
                  "format": "",
                  "is_simulator_only": "0",
                  "var": "sync_id"
                }
              ]
            }
          }
        ]
      },
      {
        "type": "action",
        "title": "Save sync variables",
        "status": "live",
        "params": {
          "actions": [
            {
              "action": "_set_key",
              "key": "sync_json",
              "value": "{% set json = {\r\n\t\"since\": sync_since,\r\n\t\"id\": sync_id,\r\n} %}\r\n{{json|json_encode|json_pretty}}",
              "expires_at": ""
            }
          ]
        }
      }
    ]
  }
}
Click the Save Changes button.
You'll be prompted to enter your Salesforce connected account.
Select the right account from the chooser.
Click the Save Changes button again.
Import the helper behavior to reset synchronization
When you add new custom fields to your Salesforce object, you'll need to reset synchronization between Cerb and Salesforce to retroactively send those values for old records.
Let's import a second behavior to do that for you.
Click on the (+) icon above the behaviors worklist again.
Switch to Import mode.
Paste the following behavior into the large textbox:
{
  "behavior": {
    "uid": "behavior_salesforce_reset_sync",
    "title": "Reset Salesforce ticket synchronization",
    "is_disabled": false,
    "is_private": true,
    "priority": 50,
    "event": {
      "key": "event.macro.bot",
      "label": "Custom behavior on bot"
    },
    "nodes": [
      {
        "type": "action",
        "title": "Clear the variable",
        "status": "live",
        "params": {
          "actions": [
            {
              "action": "_set_key",
              "key": "sync_json",
              "value": "{}",
              "expires_at": ""
            }
          ]
        }
      }
    ]
  }
}
Click the Save Changes button.
Close out the popup windows.
Test record synchronization
Run the simulator on the sync behavior
Navigate to Search » Bots.
Open the card for Salesforce Bot.
Click the Behaviors button.
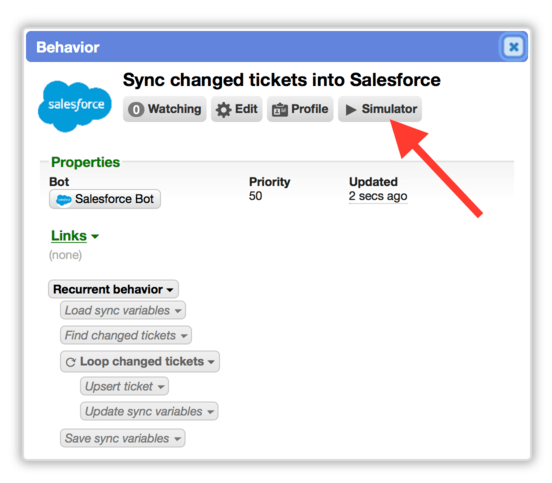
Open the card for the Sync changed tickets into Salesforce behavior.
Click the Simulator button at the top of the card:
Click the Simulate button.
You should see a lot of output in the simulator.
First, the recurrent behavior will Load sync variables to determine where it left off in the last run.
It will then load up to the next 25 changed tickets.
For each of those tickets, it will send an upsert1 request to Salesforce's API. This matches ticket records using the mask field. If a match exists in Salesforce the fields will be updated. If it doesn't exist the record will be created.
After sending the changed record data, the bot saves its current progress for the next time it runs.
Check Salesforce
You should have some new ticket records in Salesforce.
Switch back to Salesforce in your browser.
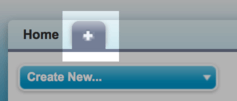
Click the + tab at the top of the page:
Select Tickets from near the bottom of the list of tabs.
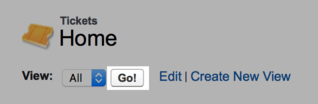
At the top of the tab, select All and click the Go! button to display all fields:
You should see a list like this:
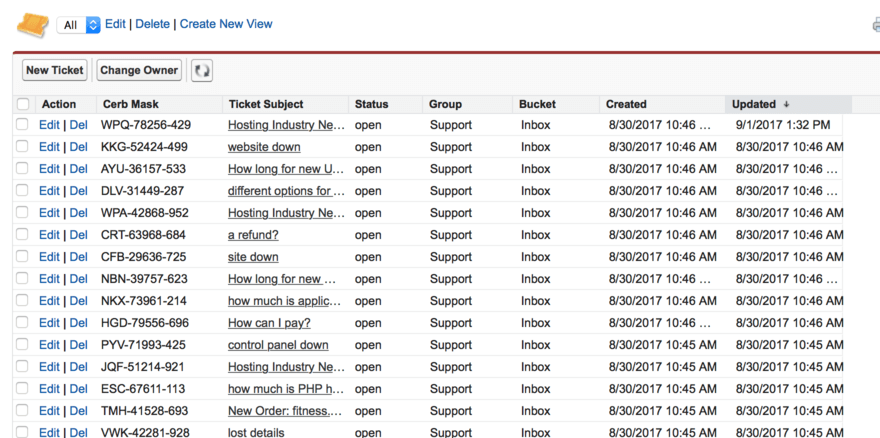
The records can now be used for reporting in Salesforce.
Turn on synchronization
The synchronization behavior is disabled by default. When you're done testing, you can enable it and Cerb will run it every 10 minutes to synchronize your ticket history into Salesforce. You can decrease the interval of the recurrent behavior to make it run more often (e.g. */5 for every 5 minutes).
Next steps
In the near future, we'll be adding a guide for using Salesforce Canvas and VisualForce for Cerb integration. This can automatically sign a Salesforce user into Cerb (with no login prompt) and display the current ticket's profile right on the ticket page in Salesforce. Salesforce users are able to use all of Cerb's functionality without having to use two apps or remember two logins.
References
-
Salesforce: Insert or Update (Upsert) a Record Using an External ID - https://developer.salesforce.com/docs/atlas.en-us.api_rest.meta/api_rest/dome_upsert.htm ↩