Decrypt messages in your browser with Mailvelope
- Introduction
- Install the Mailvelope browser extension
- Generate encryption keys
- Enable Cerb as an email provider
- Send an encrypted message to Cerb
- Decrypting messages in Cerb
- References
Introduction
Cerb 8.1 includes support for sending and receiving encrypted email using OpenPGP.
Workers can send encrypted messages by using the recipients' public keys, without relying on an extra encryption application or key server. Cerb stores an unencrypted copy of sent messages in the history for other workers to read. This improves security for recipients, without requiring workers to do anything different.
Things are a little more complicated on the decryption side. When an encrypted message is received and you want it to be automatically decrypted into plaintext for everyone to read (without workers being aware of keys or how encryption works), then you need to store a shared private key on the server without a passphrase.
Let's not mince words. Storing a private key without a passphrase on a public web server is bad security; but it does protect your messages in transit in a similar way to how SSL certificates work for protecting web traffic. This prevents messages from being read by anyone other than the sender or intended recipients (e.g. Internet providers, network providers, server providers, email providers, IT departments, co-workers, state actors, etc).
We only recommend configuring automatic decryption if you understand these risks.
If your private key is compromised (i.e. stolen by a malicious actor through a vulnerability on your server) then a third-party can impersonate you by signing messages or files with your key, and they can decrypt any encrypted content associated with that key (which Cerb will have already done in the database).
To reduce the potential damage if your server-side private key is compromised, you can use a separate private key with only subkeys that have reduced privileges and can be revoked, while keeping your master private key offline. However, the stolen subkey can still be used to decrypt anything that was encrypted for that key prior to you revoking it.
For this reason, if you plan to configure automatic decryption with a server-side private key, we highly recommend that you use a separate encryption key pair for shared mailboxes like support@example.com, using only decryption subkeys, with each worker also having their own private key that is never shared with anyone.
If you deal with sensitive client information (e.g. authentication, financial, medical, voting, whistleblower) then you should follow the best practices for encryption and not enable automatic decryption for shared keys.
The more secure option in these scenarios is to leave messages encrypted in Cerb's database and message history. Even if your server or database was compromised by a malicious actor, this sensitive information would remain encrypted in a secure way. To read a message, authorized workers would decrypt it within their browser with their own secret copy of the private key using a strong passphrase.
Mailvelope1 is an open-source browser extension for Chrome and Firefox that simplifies this process. When enabled for a web-based application like Cerb, it can detect encrypted messages displayed in the browser and help decrypt them in a temporary way.
This approach allows you to receive encrypted messages in a shared mailbox that are only readable by specific workers – determined ahead of time, and specified through their public keys by the sender.
This guide describes how to use Mailvelope and Cerb together to communicate more securely through email by delegating decryption to only authorized workers.
Install the Mailvelope browser extension
First, the workers who will be decrypting messages need to install the Mailvelope browser plugin.
-
Visit the Mailvelope site.
-
Install the browser plugin for Chrome or Firefox.
Generate encryption keys
Next, each worker should generate or import their own private key.
You should also generate a separate key pair for your shared mailboxes that authorized workers can securely share and import.
-
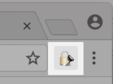
Click on the new Mailvelope icon in the top right of the browser.
-
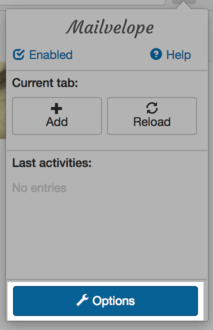
Click the blue Options button at the bottom of the popup:
-
Click the Setup section on the left.
-
Click the Generate key button to create a new key-pair. This includes a public key to share with others and a private key to keep to yourself.
- Fill in the form:
- Name: Your full name.
- Email: Your primary email address.
- Password: A passphrase to protect your private key. You will use this when decrypting messages.
- Upload public key: If checked, your public key will be uploaded to the Mailvelope key server so it can be found by other users who know your email address.
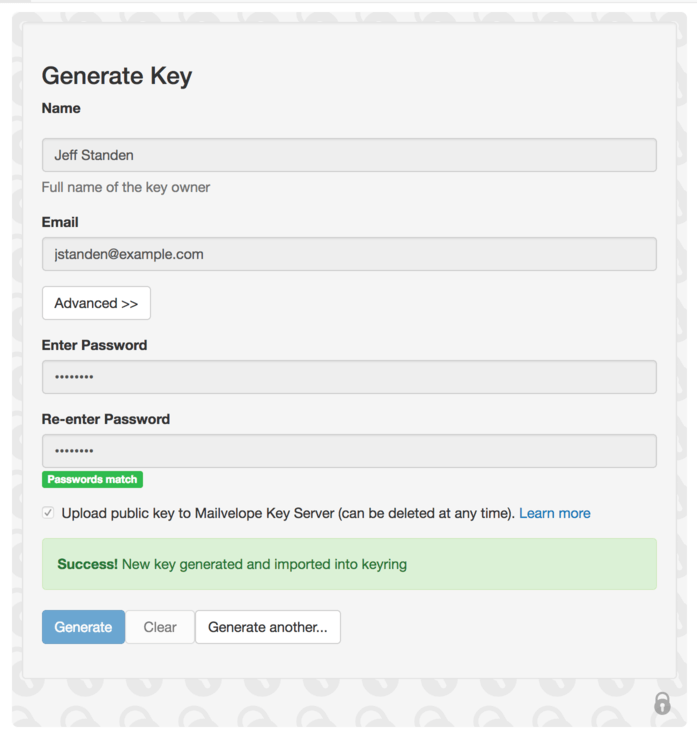
- Click the blue Generate button at the bottom of the form.
Enable Cerb as an email provider
To allow Mailvelope to recognize encrypted messages, Cerb needs to be added as an email provider.
-
Log in to Cerb.
-
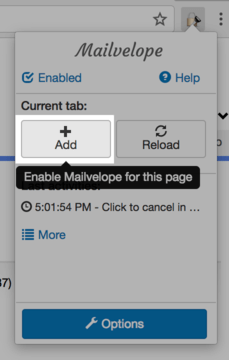
Click on the Mailvelope button in the top right of your browser.
-
Click the Add button.
Send an encrypted message to Cerb
Let's send an encrypted message to the shared mailbox so we can test decryption.
If you already have a preferred way of sending encrypted email, go ahead and use that to send a test message to Cerb encrypted with your public key.
Otherwise, you can use the following method:
-
Log in to Cerb.
-
Navigate to Search » Tickets.
-
Click the (+) icon above the worklist to compose a new ticket.
- Address the ticket to yourself:
- To:
(your email address) - Subject:
This is a sample encrypted message
- To:
-
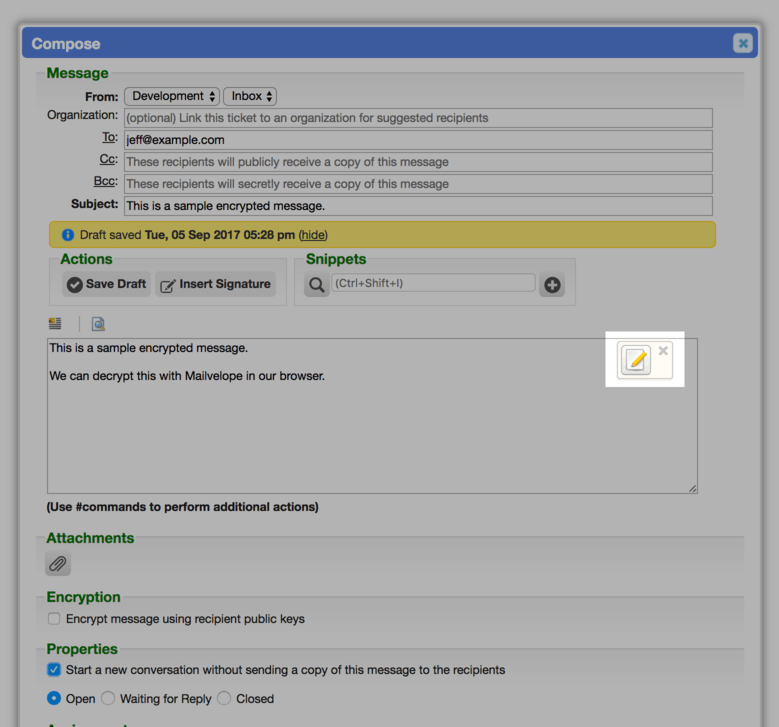
In the message body, erase any default content like the signature. Type a sample message to encrypt.
-
Click the Mailvelope icon in the top right of the message body.
-
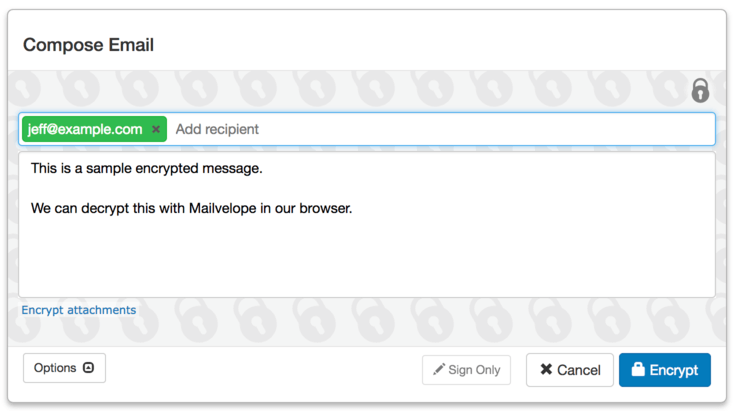
In the Add recipient field, type the shared email address from your shared key pair.
-
Click the blue Encrypt button in the lower right.
-
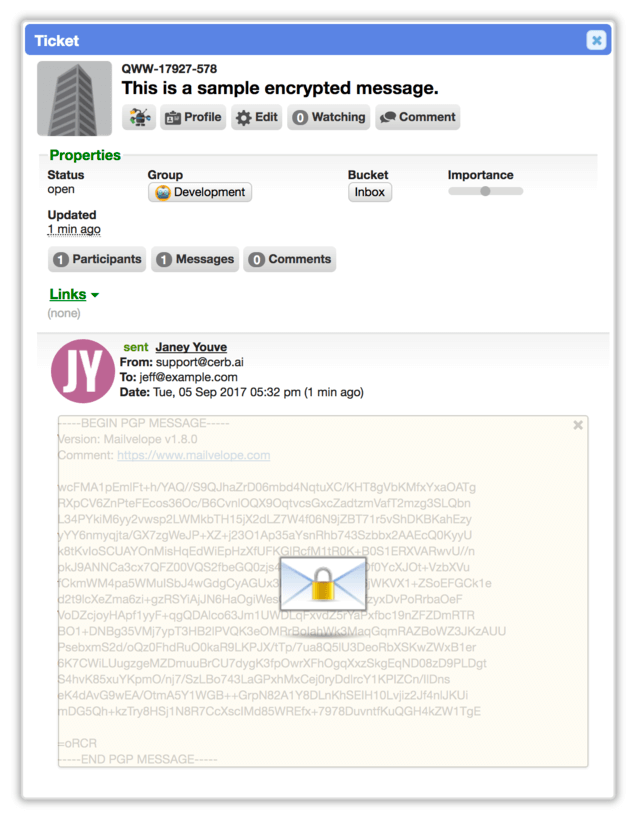
You should now see the encrypted message contents starting with
-----BEGIN PGP MESSAGE-----. -
In Properties, check the box for Start a new conversation without sending a copy of this message to the recipients, and set the status to Open.
- Click the Send Message button.
Decrypting messages in Cerb
Now let's decrypt the new message in Cerb using Mailvelope.
-
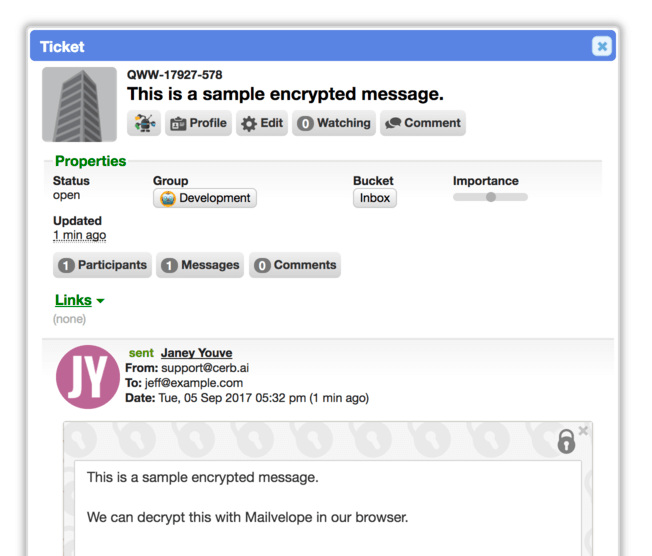
View the ticket you just created in Cerb. You can do this from either its peek card or its profile page.
-
Mailvelope will detect the PGP encrypted message and highlight it:
-
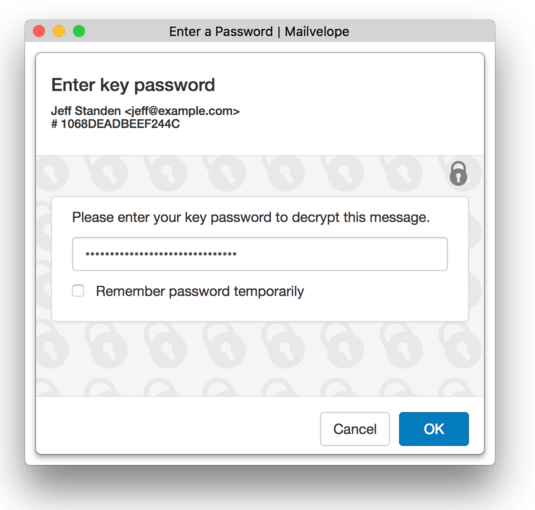
Click on the locked envelope icon to decrypt the message.
-
Enter the private key passphrase:
-
Click the blue OK button.
-
The decrypted message contents should now be displayed right in the browser:
When you close the card popup or profile page, the message remains encrypted in Cerb. Only authorized workers are able to decrypt and read it.
References
-
Mailvelope - https://www.mailvelope.com/en ↩