Proxy Outgoing HTTP Requests Through Squid
Introduction
Squid1 is a caching proxy for the Web supporting HTTP, HTTPS, FTP, and more. It reduces bandwidth and improves response times by caching and reusing frequently-requested web pages. When integrated with Cerb, a Squid proxy provides several benefits:
- Bandwidth reduction by caching frequently-requested content.
- Improved response times for external API calls and web requests.
- Enhanced security through centralized traffic control.
- Detailed logging of outbound traffic.
- Content filtering and access control for external services.
- Server acceleration for better performance.
This guide will help you set up a Squid proxy in Docker and configure Cerb to route all outgoing HTTP requests through it.
Requirements
- Docker installed and running
- A working Cerb installation in Docker
- htpasswd utility (part of apache2-utils on Ubuntu/Debian, httpd-tools on CentOS/RHEL, or Apache HTTP Server on Windows/macOS)
Setting Up Squid Proxy
Create Required Directories
First, create a directory structure to hold your Squid configuration:
mkdir ~/squid-setup
cd ~/squid-setup
mkdir squid-config
Create Squid Configuration Files
echo "http_port 3128
auth_param basic program /usr/lib/squid/basic_ncsa_auth /etc/squid/passwords
auth_param basic realm proxy
acl authenticated proxy_auth REQUIRED
http_access allow authenticated
http_access deny all" > squid-config/squid.conf
Create password file
When prompted, enter a secure password.
htpasswd -c squid-config/passwords cerb_proxyRun Squid Docker Container
Start the Squid proxy container with your configuration files. This command maps port 8888 on your host to port 3128 in the container and mounts your configuration files.
docker run -d \
  --name squid-proxy \
  -e TZ=UTC \
  -p 8888:3128 \
  -v $(pwd)/squid-config/squid.conf:/etc/squid/squid.conf \
  -v $(pwd)/squid-config/passwords:/etc/squid/passwords \
  ubuntu/squid:5.2-22.04_beta
Test proxy with curl
Verify that your proxy is working correctly by making a test request through it. This command uses curl to fetch the first 100 characters from a Cerb documentation page.
curl -s -x "http://cerb_proxy:FJ\!3G\!ht3Y@localhost:8888" -H "Accept: application/json" "https://cerb.ai/docs/history/" | head -c 100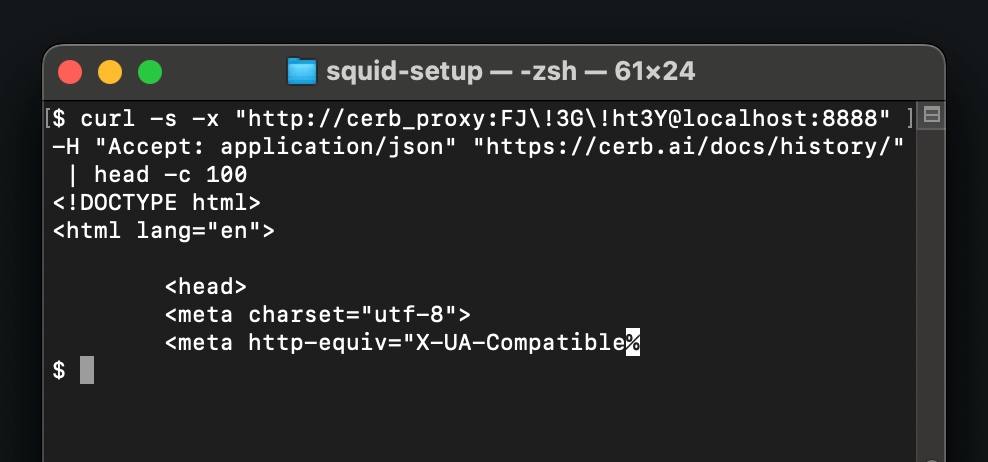
Configuring Cerb
Update the configuration file
In production
Edit the framework.config.php file and add the following line with the other define() statements at the top:
define('DEVBLOCKS_HTTP_PROXY', 'http://cerb_proxy:YOUR_PASSWORD@host.docker.internal:8888');- Replace
YOUR_PASSWORDwith your Squid password. - Replace
host.docker.internalwith your Squid hostname.
In Docker
For a Docker-based Cerb installation, you need to modify the configuration file to use the Squid proxy. This will be a file like cerb.config.php in the install/docker/_conf/ directory.
host.docker.internal is a special DNS name that resolves to the host machine from inside Docker containers.
Verifying Integration
Let's send an HTTP Get request from Cerb and verify we are routing through our Squid proxy.
We will use an example from automations to make the request.
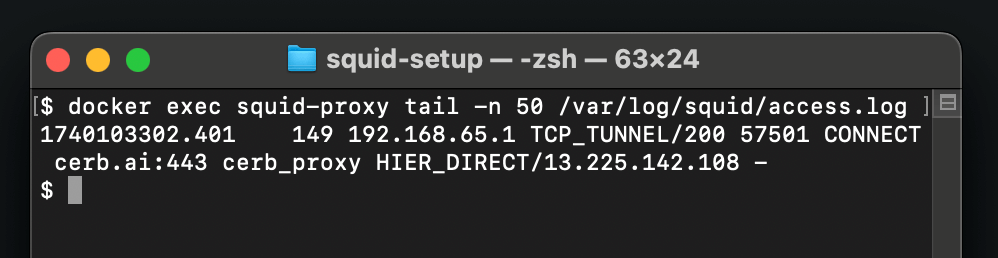
We can now monitor the Squid access logs to confirm requests from Cerb are being proxied.
docker exec squid-proxy tail -n 50 /var/log/squid/access.log