Build and authenticate a custom API using webhook portals
- Introduction
- Enable the webhooks plugin
- Import the package
- Test the API endpoint
- Extend the custom API
Introduction
In Cerb, you can use automations and webhooks to build a custom API endpoint for your integrations.
For instance, you can enrich data by combining multiple data queries into a single request. This moves complexity to Cerb rather than your client-side code.
There are two ways to receive webhooks in Cerb:
| Portals | A portal endpoint that triggers your webhook. This is ideal for a publicly shared endpoint, since you can use a custom domain name to avoid exposing your Cerb URL (e.g. Cloudflare, Nginx). |
| Secret URLs | A randomly generated URL that triggers your webhook. These are ideal for private, ad-hoc integrations where you just need a URL. |
In this guide we'll use a webhook portal, but either method can be used to build a custom API.
If your custom API performs actions in Cerb, you shouldn't rely on a secret URL to protect it. The package in this guide provides a choice from three authentication methods that have different tradeoffs.
| API Key | An arbitrary API key that functions like a password. You're responsible for mapping keys to workers/permissions and key rotation. This is the simplest method to implement but offers the least protection (e.g. HTTPS). |
| OAuth2 Token | An access token linked to a specific worker with a given 'scope' of permissions. Cerb can generate access tokens for workers from your app, as well as exchange refresh tokens for a new short-lived access token. You can also generate them from Setup » Developers » OAuth2 Token Generator; however, long-lived access tokens are vulnerable in the same ways as an API key. |
| HMAC Signature | A time-limited signature based on the properties of the HTTP request. A message hash is generated using a shared secret known to the automation and your script, but not transmitted. This provides extra protection (e.g. replay attacks, fully logged requests), but is more complex to implement in your script since signatures must be generated in the exact same manner (e.g. order of HTTP query parameters). This is how API key-pairs work in Cerb and Amazon Web Services. |
Enable the webhooks plugin
If you haven't already, enable the Webhooks plugin from Setup » Configure » Plugins.
Import the package
We've provided examples for each of the three authentication methods.
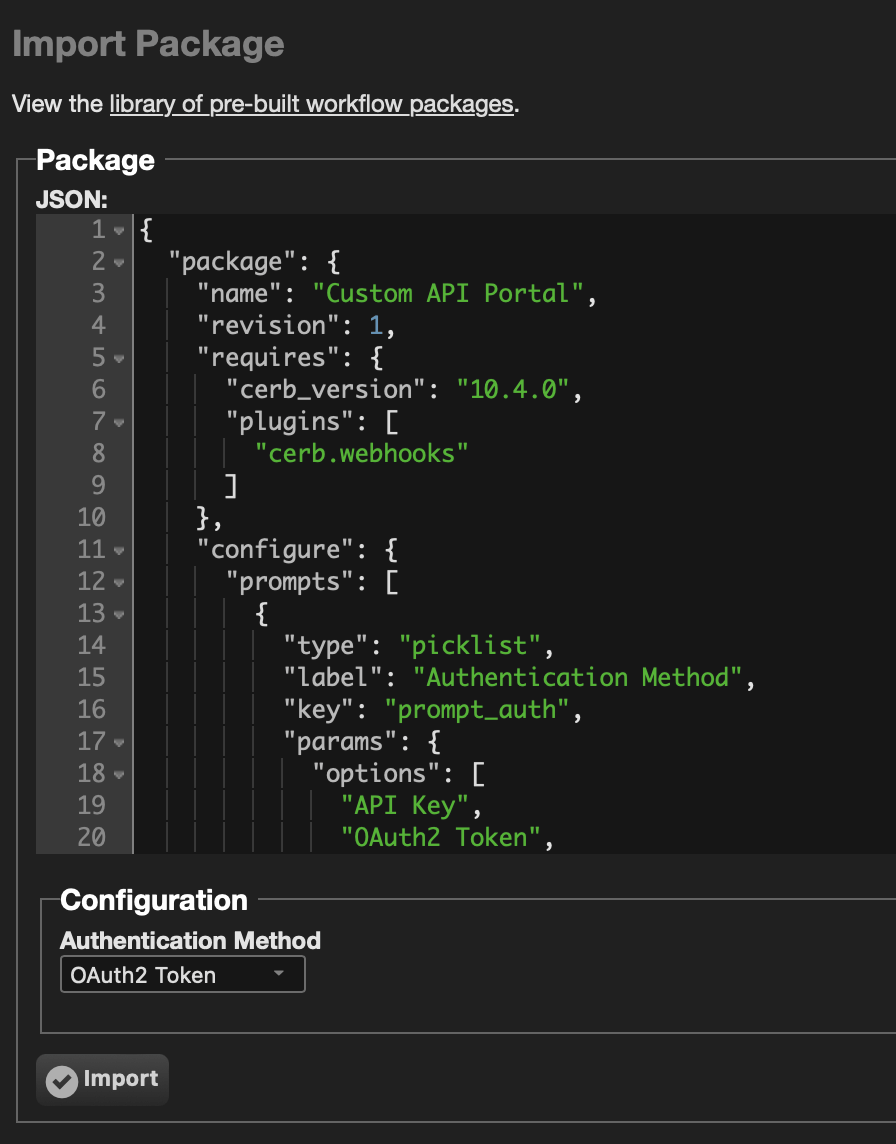
Navigate to Setup » Packages » Import and paste the following package:
{
"package": {
"name": "Custom API Portal",
"revision": 1,
"requires": {
"cerb_version": "10.4.0",
"plugins": [
"cerb.webhooks"
]
},
"configure": {
"prompts": [
{
"type": "picklist",
"label": "Authentication Method",
"key": "prompt_auth",
"params": {
"options": [
"API Key",
"OAuth2 Token",
"HMAC Signature"
],
"default": "API Key"
}
}
],
"placeholders": [
{
"type": "random",
"key": "random_code",
"params": {
"length": "8"
}
},
{
"type": "random",
"key": "default_api_key",
"params": {
"length": "32"
}
}
]
}
},
"records": [
{
"uid": "automation_apiKey",
"_exclude": "{{{prompt_auth != 'API Key'}}}",
"_context": "automation",
"name": "example.webhookPortal.customApi.{{{random_code}}}",
"extension_id": "cerb.trigger.webhook.respond",
"description": "",
"script": "start:\r\n set/init:\r\n # You can map API keys to specific workers as needed\r\n valid_api_key: {{{default_api_key|lower}}}\r\n \r\n # Make sure the API key is valid\r\n decision/validate:\r\n outcome/noApiKey:\r\n if@bool: {{not request_headers.authorization}}\r\n then:\r\n return:\r\n status_code@int: 401\r\n body: Unauthorized. Provide a valid API key in the `Authorization: <key>` header.\r\n outcome/invalidKey:\r\n if@bool: {{request_headers.authorization != valid_api_key}}\r\n then:\r\n return:\r\n status_code@int: 403\r\n body: Invalid API key.\r\n \r\n # The API key is valid at this point\r\n return:\r\n status_code@int: 200\r\n body: Success!",
"policy_kata": "commands:\r\n # [TODO] Specify a command policy here (use Ctrl+Space for autocompletion)\r\n "
},
{
"uid": "automation_oauthToken",
"_exclude": "{{{prompt_auth != 'OAuth2 Token'}}}",
"_context": "automation",
"name": "example.webhookPortal.customApi.{{{random_code}}}",
"extension_id": "cerb.trigger.webhook.respond",
"description": "",
"script": "start:\r\n # Make sure a token was provided\r\n outcome/noToken:\r\n if@bool: {{not request_headers.authorization}}\r\n then:\r\n return:\r\n status_code@int: 401\r\n body: Unauthorized. Provide a valid token in the `Authorization: Bearer <token>` header.\r\n \r\n # Parse and validate the token\r\n api.command/validateToken:\r\n inputs:\r\n name: cerb.commands.oauth2.token.validate\r\n params:\r\n token: {{request_headers.authorization|split(' ')|last}}\r\n output: access_token\r\n on_success:\r\n # [TODO] Check token scopes\r\n on_error:\r\n return:\r\n status_code@int: 401\r\n body: Invalid or expired token.\r\n \r\n # The token is valid at this point\r\n return:\r\n status_code@int: 200\r\n headers:\r\n Content-Type: application/json\r\n body: {{access_token|json_encode|json_pretty}}",
"policy_kata": "commands:\r\n api.command:\r\n deny/name@bool: {{inputs.name != 'cerb.commands.oauth2.token.validate'}}\r\n allow@bool: yes"
},
{
"uid": "automation_hmacSig",
"_exclude": "{{{prompt_auth != 'HMAC Signature'}}}",
"_context": "automation",
"name": "example.webhookPortal.customApi.{{{random_code}}}",
"extension_id": "cerb.trigger.webhook.respond",
"description": "",
"script": "start:\r\n set/init:\r\n # Use this in your caller to generate request signatures\r\n hmac_secret: {{{default_api_key}}}\r\n # Set this to a non-zero value to enable\r\n hmac_expires_in_secs@int: 0\r\n # Generate the string to sign (use the same process in your caller)\r\n string_to_sign@trim:\r\n {{[\r\n request_method|upper,\r\n request_path,\r\n request_params|map((v,k) => k ~ '=' ~ v)|sort|join(\"&\"),\r\n request_headers.content_type,\r\n request_headers.date,\r\n request_body|sha1\r\n ]|join(\"\\n\")}}\r\n # Create a HMAC signature\r\n generated_signature: {{string_to_sign|hash_hmac(hmac_secret,\"sha256\")}}\r\n \r\n decision/validate:\r\n outcome/noSig:\r\n if@bool: {{not request_headers.authorization}}\r\n then:\r\n return:\r\n status_code@int: 401\r\n body: Unauthorized. Provide an HMAC signature in the `Authorization: <signature>` header.\r\n outcome/invalid:\r\n if@bool: {{request_headers.authorization != generated_signature}}\r\n then:\r\n return:\r\n status_code@int: 403\r\n body: Invalid HMAC signature.\r\n # Make sure the HTTP `Date:` header is within 5 mins (avoid replay attacks)\r\n outcome/expired:\r\n if@bool:\r\n {{\r\n hmac_expires_in_secs\r\n and 'now'|date('U') - request_headers.date|default('0')|date('U') > hmac_expires_in_secs\r\n }}\r\n then:\r\n return:\r\n status_code@int: 403\r\n body: The signature has expired.\r\n \r\n # The signature is valid at this point\r\n return:\r\n status_code@int: 200\r\n body: Success!",
"policy_kata": "commands:\r\n # [TODO] Specify a command policy here (use Ctrl+Space for autocompletion)\r\n "
},
{
"uid": "portal_custom_api",
"_context": "community_portal",
"name": "Custom API ({{{prompt_auth}}})",
"extension_id": "webhooks.portal",
"uri": "custom-api-{{{random_code}}}",
"params": {
"automations_kata": "automation/customApi{{{random_code}}}:\n uri: cerb:automation:example.webhookPortal.customApi.{{{random_code}}}\n disabled@bool: no"
}
}
]
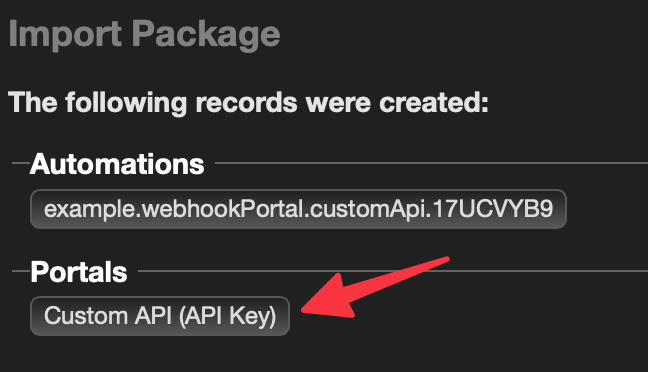
}Click the Import button at the bottom.
Select an Authentication Method. If you're unsure, choose API Key. This package can be imported multiple times without conflicts.
Click the Import button again.
Test the API endpoint
Click on and edit the imported portal to view its base URL.
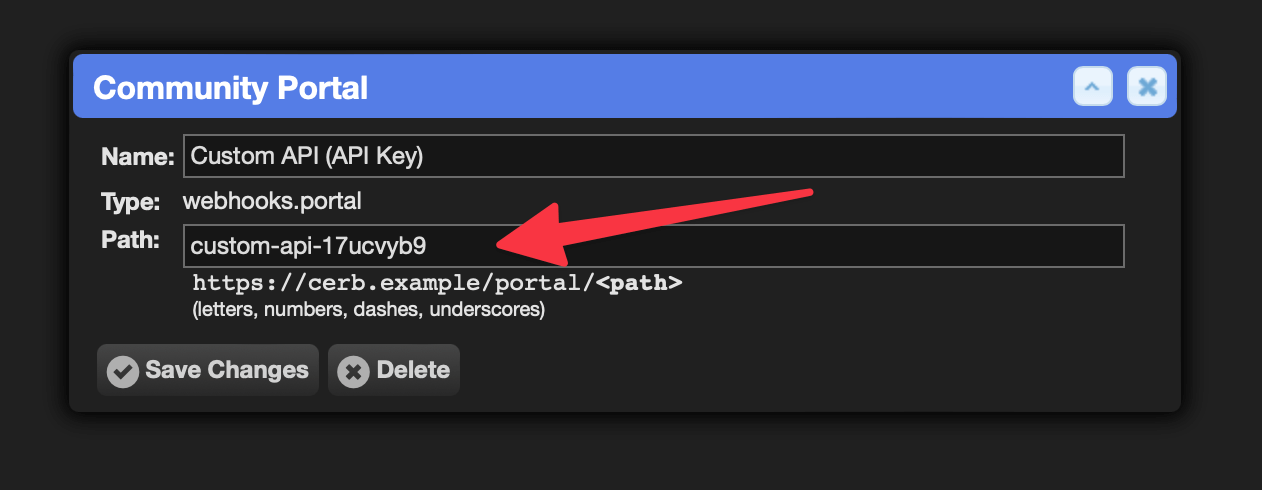
You can change the portal Path: to a new value, but keep in mind this must be a unique name within all of your portals. The package in this guide adds a random code to the end to ensure uniqueness on multiple imports.
For the examples below, we'll assume the path is custom-api.
This can be accessed directly like: https://cerb.example/portal/custom-api
API Key
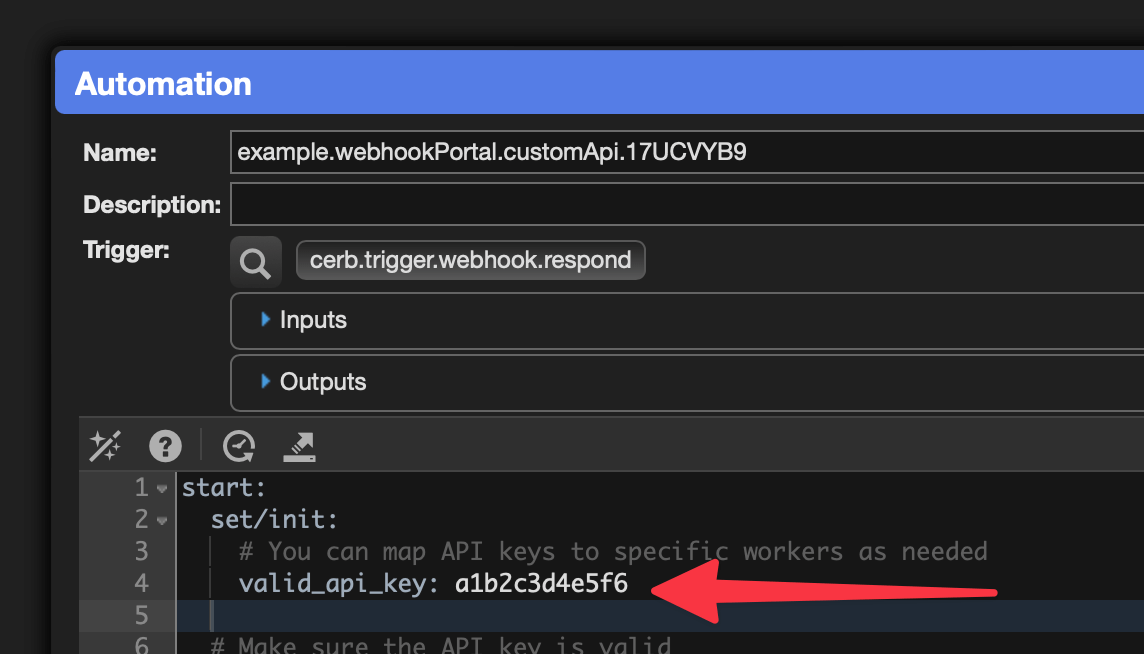
Find the default API key from Search » Automations by editing the example.webhookPortal.customApi.* automation.
It's to the right of valid_api_key:
Simulating from the automation editor
You can test a request from Input: in the lower left of the automation editor. Set the Authorization: header to your API key and click the play button.
request_headers:
  authorization: a1b2c3d4e5f6
If you change or omit the API key the request will fail as expected.
Testing from curl
A request from a utility like curl would look like:
curl -i -H "Authorization: a1b2c3d4e5f6" "https://cerb.example/portal/custom-api"Implementing in your app
To make a request to the custom API endpoint from your app, add an Authorization: <key> header using the HTTP library of your choice.
OAuth2 Token
Cerb can generate access tokens for workers from your app, as well as exchange refresh tokens for a new short-lived access token.
For detailed instructions on creating and using OAuth2 tokens, see the OAuth2 Token Generator guide.
HMAC Signature
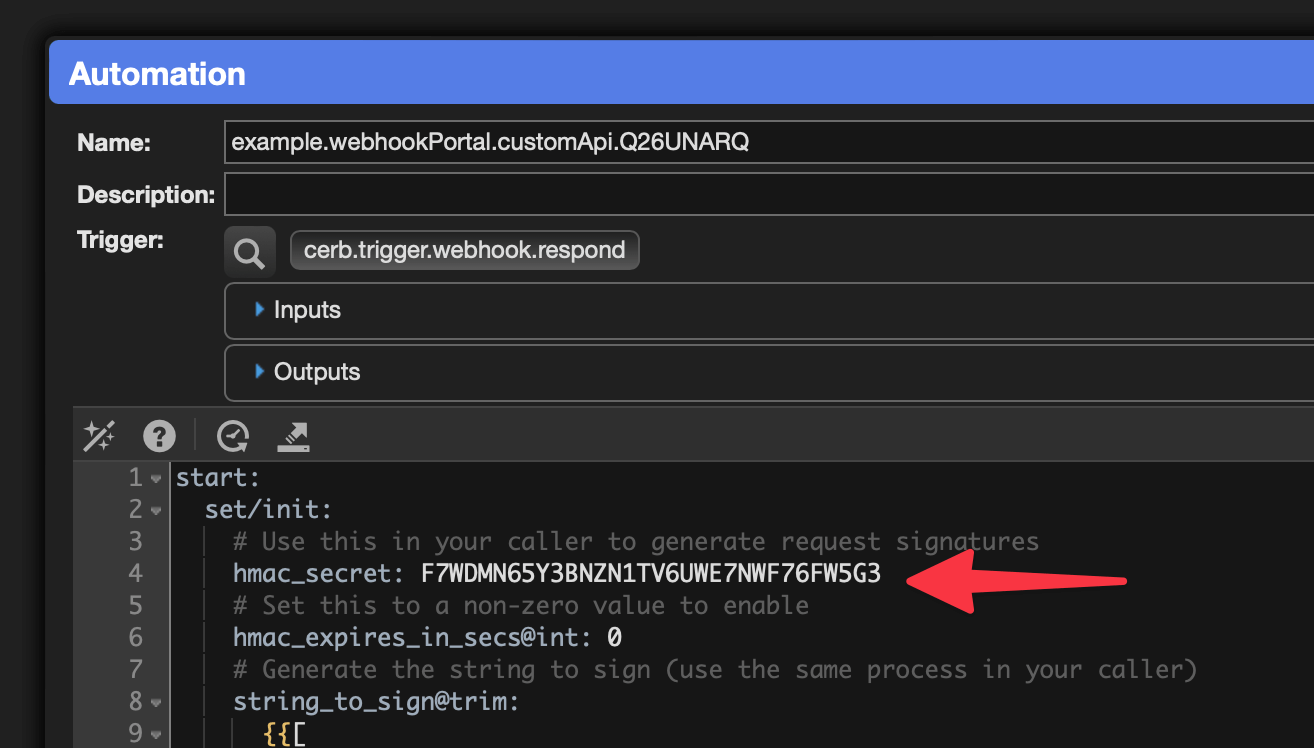
Find the default HMAC secret from Search » Automations by editing the example.webhookPortal.customApi.* automation.
It's to the right of hmac_secret:
Simulating from the automation editor
You can test a request from Input: in the lower left of the automation editor. Set the Authorization: Bearer header to your token and click the play button.
request_method: POST
request_path: some/path
request_params:
  b: bar
  a: foo
request_headers:
  content_type: application/json
  date: "Wed, 21 Feb 2024 03:20:45 +0000"
  authorization: a3832d3b6c6d7d987bb76fb7bac85e7dc84849e81689eb06ff8503434551d866
request_body: This is a test body
Your signature Input for authorization: will be different from the example above since your HMAC secret was randomly generated. Run the automation simulator once and copy the value for generated_signature: in the Output on the bottom right. Your subsequent request should now be successful.
Protecting against replay attacks
Note that the example Input date: is in the past since it reflects the time that this guide was written. This is a replay attack.
At the top of the automation, set the hmac_expires_in_secs@int: key to a non-zero value of seconds. A good default is 300 (5 minutes). This is the maximum amount of time that an intercepted HTTP request could be repeated. It also allows for a slight difference between the clocks on the client and server.
After changing that value, re-simulating the automation should return an expired token error.
Implementing in your app
Your app needs to generate an HMAC hash with the same process as the automation. For example in PHP:
$secret = 'F7WDMN65Y3BNZN1TV6UWE7NWF76FW5G3';

$string_to_sign = implode(
  "\n",
  [
    'POST',             // http method in UPPERCASE
    'some/path',        // path with no leading or trailing slashes
    'a=foo&b=bar',      // query arguments sorted in alphabetical order
    'application/json', // `Content-Type:` header
    date('r'),          // `Date:` header
    sha1('This is a test body') // SHA-1 of the HTTP body (hash of blank string for GET)
  ]
);

// SHA-256 message digest using the secret
echo $string_to_sign,
  "\n",
  hash_hmac('sha256', $string_to_sign, $secret)
;
Include the signature in the Authorization: HTTP request header:
curl -i -X POST -H "Authorization: 11213c4eef09e3597ef3d41ac0dde59fa94fc4c0157877dbf815461073a5ce44" \
  -H "Content-Type: application/json" -H "Date: Wed, 21 Feb 2024 03:32:56 +0000" \
  -d "This is a test body" "https://cerb.example/portal/custom-api/some/path/?b=bar&a=foo"
You can modify the "string to sign" in both your app and the automation to meet your needs.
Extend the custom API
You should create an automation.function automation for each endpoint in your API.
Name the automations using the same namespace as your webhook.respond automation. For instance: example.webhookPortal.customApi.ticketsOpen
In the Policy tab of your webhook automation, allow all function: calls to that namespace:
commands:
  function:
    deny/uri@bool: {{uri is not prefixed ('cerb:automation:example.webhookPortal.customApi.')}}
    allow@bool: yes
After your authentication, run the automation function for the requested endpoint.
In if@bool:, you should check the path as well as permissions for the API key, token, or worker.
You can pass inputs: to the function from the HTTP request.
You can use output: from the function in your return:body:.
  # The signature is valid at this point
  decision/endpoint:
    outcome/openTickets:
      if@bool: {{request_path == 'tickets/open'}}
      then:
        function:
          uri: cerb:automation:example.webhookPortal.customApi.ticketsOpen
          inputs:
            # [TODO] Custom inputs go here
          output: results
          on_success:
            return:
              headers:
                Content-Type: application/json
              body: {{results.data|json_encode}}
          on_error:
            return:
              status_code: 500

    outcome/else:
      then:
        return:
          status_code: 404