Backups
If you're using Cerb Cloud then we handle backups for you already.
To fully protect your Cerb data you need to backup both the MySQL database and the storage/ filesystem. While there are many good ways to perform backups, this document will focus on the best practices we've discovered over the past decade of hosting hundreds of Cerb instances on our On-Demand network. The examples are Unix-based.
Requirements:
- A Unix-based server with shell access
- A Cerb installation
Set up the environment
Create a backups user
For convenience and security, it's a good idea to make a backups user on the local system. This account's home directory should be on a different hard disk than your live databases to provide extra fault tolerance and better write performance. The examples below will refer to this location as ~backups. A separate location is important – while a RAID1 configuration will protect you from the failure of individual storage hardware devices, it won't protect you from certain forms of filesystem corruption, or any data loss not related to hardware (e.g. bugs, errant queries, maliciousness). We've seen a failing RAID controller write corrupt data to the entire disk array.
You can add a new backups user with the following command:
adduser --system --home /backups backupsCreate a backups database user with a shadow password
In addition to the backups user on the system, it's a really smart idea to make a separate database user that only has read-only access to your databases. This helps protect you from making unintentional changes to the data, especially when you start automating backups.
In MySQL you can add a read-only user with the following query:
GRANT SELECT, RELOAD, LOCK TABLES
ON *.*
TO backups@localhost
IDENTIFIED BY 's3cret';
Choose your own password in place of s3cret above.
Next, we're going to create a shadow file2 to securely store your database password for automation. This is a fancy way of saying we're going to store the password text inside a hidden file with strict permissions.
When writing to the file, it's better to use an editor like vi rather than redirecting the output of echo, since you don't want to leave your password in your command history. We'll use echo here for simplicity:
Write your password to the shadow file:
echo -n "s3cret" > ~backups/.db.shadow;Make the backups user the owner of the shadow file:
chown backups ~backups/.db.shadow;Make the file read-only by the owner and invisible to everyone else:
chmod 400 ~backups/.db.shadow;In the examples below we'll use this shadow file in place of literally typing the password on the command line. In addition to enabling automation, this also helps prevent sensitive information from being visible to other users in the global process list, logs, or command history.
Backing up the database
The database stores the majority of Cerb's data. The only exceptions are the large, immutable files in the storage/ filesystem – attachments by default, and email content if enabled.
We no longer recommend using the mysqlhotcopy command for backups. Even though it's often faster than other options for MyISAM tables, it doesn't work for InnoDB tables, and the binary files it copies aren't guaranteed to be compatible with different server architectures. We've seen several situations where moving the binary files between 32-bit and 64-bit systems, or platforms with different endianness, led to subtle data corruption that became worse over time.
Using mysqldump (recommended)
mysqldump is the standard tool for performing MySQL database backups.
Pros:
- It works for most database storage engine types (e.g. MyISAM, InnoDB).
- It's very corruption-tolerant since it writes text files that you can edit with any text editor. In the event of file corruption it's easier to salvage your data.
- It's available in almost every environment.
- SQL dumps are widely compatible with different versions of MySQL on different architectures.
- You can use the
--tabflag to dump a large database to a.sqlschema and.txtdata file per table, which is often much faster. - You can use the
--master-data=2flag to record the binary log file and position in the dump file for each database. This enables incremental backups and point-in-time recovery when MySQL's binary logs are enabled. - You can use
mysqldumpon a read-only replica to avoid locking the live database.
Cons:
- When you reimport a SQL dump file the database will have to recreate your indexes which may take a significant amount of time. The
--disable-keysflag is enabled by default to improve performance by rebuilding the keys only after all the data has been imported. - Writing a dump file is usually slower than using a tool like
mysqlhotcopyto copy the binary data files. - To ensure a consistent snapshot you need to lock your tables with
--lock-tables. This prevents data from being written to any database tables until the entire backup is complete. Without locking, new content may be written to previously backed-up table A while you're still writing the output for table B. If you're using InnoDB tables you can use the--single-transactionflag to make a consistent snapshot without locking the tables.
Usage:
mysqldump -Q --master-data=2 --single-transaction \
   -u backups \
   -p`cat ~backups/.db.shadow` \
   cerb_database > cerb_database.sql
Enabling MySQL's binary logs
MySQL's binary logs keep a record of all SQL queries that modify a database (e.g. ALTER TABLE, INSERT, UPDATE, REPLACE, DELETE). This enables you to do incremental backups and point-in-time recovery by replaying the logs against an earlier full backup.
In the my.cnf file you need to make sure these options are enabled:
log_bin                 = /backups/mysql-binlogs/mysql-bin.log
expire_logs_days        = 2
max_binlog_size         = 2000M
You can customize the settings for your own environment:
-
log_bindetermines the location and prefix of the binary logs. The above setting will create log files likemysql-bin.000012. The suffix number is incremented every time MySQL restarts or the logs are flushed. -
expire_logs_daysautomatically deletes old log files after a given number of days. The above setting is useful if you run daily full backups because you'll keep old logs around for two days. You should always be able to replay any new changes on top of your last full backup. -
max_binlog_sizedetermines the maximum size that a log file should grow to before it is automatically flushed and a new file begins. This is useful in 32-bit environments, or when you want to archive old log files more often.
Tips:
-
You can use the command
SHOW MASTER LOGSin MySQL to show information about the current binary logs. -
The
FLUSH LOGScommand in MySQL will close the current binary log and open a new one. This is a useful command to add to the top of amysqldumpscript because it will start a new binary log after each full backup. -
When importing a SQL file you generally want to avoid sending its entire contents to the binary log. You can do this with the
SET SQL_LOG_BIN=0;command. This will remain in effect for the same connection until you issueSET SQL_LOG_BIN=1;. We add this command to the top of all our.sqlbackup files.
Backing up MySQL's binary logs
You should make frequent backups of MySQL's binary logs when they are enabled. If you use Amazon's Relational Database Service (RDS) then this process is handled for you automatically. Otherwise, here are some tips to do it yourself.
Change to the directory where the log files are stored:
cd ~backups/mysql-binlogs/Your location may be different than the above example. If you're unsure, consult your my.cnf MySQL configuration file. You'll know you're in the right place when you see a mysql-bin.index file.
Now we want to flush the binary logs so a new log file is opened:
mysqladmin -u backups -p`cat ~backups/.db.shadow` flush-logsAfter a FLUSH, we can now archive and remove the older log files. We recommend using lzop for archival due to its nice balance of performance and compression, but there's nothing wrong with using other tools like zip, gzip, bzip, etc.
The following command will archive all binary log files except the currently active one:
lzop `head -n -1 mysql-bin.index | xargs`You can then copy or move these compressed log files to a new location. We recommend archiving binlog backups in Amazon S3.
If you're using Amazon Web Services, the command to copy the files to S3 might look like:
aws s3 cp *.lzo s3://your-bucket/mysql-binlogs/`hostname -s`/In the above example, you need to replace your-bucket with a valid S3 bucket name. The hostname -s command will make a directory in that bucket for each short hostname. For example, a server with the fully qualified hostname of atlas.webgroupmedia.com will make a directory called atlas. This is useful if you have multiple servers sending binary log archives to the same bucket.
Once you've copied the binary logs to a different location, you may optionally delete them. This is important if you have limited disk space, because a busy server can easily generate several gigabytes of log files per day:
rm *.lzoFinally, you should instruct MySQL to purge the old log files. This is important because you don't want to waste server resources by constantly archiving and copying an increasingly long list of files. You only want to deal with new files since your last backup::
mysql -u backups -p`cat ~backups/.db.shadow` \
   -e "PURGE MASTER LOGS TO '`basename \`tail -n 1 mysql-bin.index\``'"
The above command will remove all binary log files except the currently active one.
MySQL keeps track of the logs with the mysql-bin.index file. It is very important that you never delete MySQL's binary log files yourself in the filesystem. Always use the PURGE MASTER LOGS command.
Backing up the storage filesystem
The storage/ filesystem contains the mail queue, import queue, and large immutable objects like email attachments. It's the only directory that you need to backup for a full recovery; the rest of the files are either temporary caches, or project files that can be re-downloaded from GitHub.
Since the bulk of the storage/ directory is comprised of files that will never be modified you should perform incremental backups. An incremental backup only copies content that is newer than the last backup. For example, imagine that you have one million attachments stored in the filesystem. If you ran backups last night, and there were 250 new attachments today, then you should only need to backup those 250 new files. It would be very inefficient to copy one million files every night. They were copied already and their contents can't change.
Using rsync (recommended)
rsync is one of the simplest ways to copy only new and modified files to a new location. Its main purpose is to synchronize multiple copies of the same directory by only copying their differences between them.
Pros:
- It's available on most Unix-based operating systems (e.g. Linux, BSD, OS X).
- It's fast and flexible.
- You can use key-based authentication to automate remote copies.
Cons:
- It's Unix-only, though there are several clones and ports available for Windows.
Usage: (to local filesystem)
rsync -a --verbose --delete /path/to/cerb/storage ~backups/storageUsage: (to SSH)
rsync -aze ssh --verbose --delete /path/to/cerb/storage \
  backups@remotehost:~backups/storage
Tips:
-
When dealing with directories in
rsync, including a trailing slash (storage/) means to copy a directory's contents but not the directory itself. Excluding the trailing slash (storage) will copy a directory and its contents. -
The
--deleteoption will remove files from the destination directory that are no longer in the source directory. Since this can be dangerous if you mistype a directory, you may omit this option until you're confident that the command is working as expected.
Keeping off-site backups
It's crucial to assume that "anything that can go wrong will go wrong"3. You can't trust your RAID, your server, or your datacenter, to store the only copy of data that your business is doomed without.
In a simple scenario, off-site backups may involve downloading a copy of your backups to your office. Keep in mind that it does you no good to have 250GB of backups on your office network if you have a 1Mbps upstream to your datacenter. If you could drive across the country to hand deliver your backups faster than you could upload them, then you'll want to place your backups somewhere where you can retrieve them quickly.
However, there's a lot to be said for the secure feeling of having tangible, offline copy of your critical data; and even our own 15 year old Cerb database can fit on a small USB thumb drive and be uploaded in a few minutes on a 1Gbps fiber connection.
If you have the resources, you may also choose to have one or more standby servers in a different locations than your production server. This provides business continuity protection against major disasters that may affect large geographical areas. You can synchronize your database across multiple machines using MySQL's replication functionality. You can also enable the binary logs and save them to an external storage device or service.
We prefer to use cloud computing services to store our off-site backups. We're able to store massive amounts of data in multiple geographic locations (i.e. highly redundantly) for a few dollars per month. It's also much faster for us to store and retrieve content between our servers and the cloud (often dozens of megabytes per second), compared to our servers and our office.
Using Amazon S3 (recommended)
Amazon S3 is a storage service. At the time of this writing, storage costs $0.03/GB per month. For that price, your data is stored redundantly in multiple locations. You also get reasonably fast network access to it (generally >60MB/sec for us). Most of the databases on our network are less than 10GB, which means they can be stored in S3 for less than $0.50 per month. Be sure to read the terms on their site, as there are also similar rates for bandwidth – though, most often you'll just be uploading once per backup and never retrieving the files again. That means there's no monthly bandwidth cost after you first copy the files.
Pros:
- It's highly redundant and secure.
- It's inexpensive.
- Amazon is a very well known and respected online technology company.
Cons:
- It costs extra money (but it's worth every penny!)
Usage:
- Sign up for Amazon Web Services (click Create an AWS Account on the right).

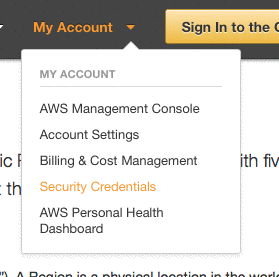
- Once your registration is complete, click on Security Credentials from the My Account menu.
Using AWS CLI to send database backups to S3
We highly recommend using the Amazon Web Services command line interface (AWS CLI) for interacting with Amazon S3 from your server. You can follow these instructions to install AWS CLI on your server.
Usage:
aws s3 cp *.gz s3://yourbucket/backups/`hostname -s`/dbs/`date +%Y%m%d`/The command above will send all gzipped files (*.gz) to the bucket named yourbucket in S3. The files will be saved in a backups directory structure organized by server name (`hostname -s`) and date (`date +%Y%m%d`).
Tips:
-
Use Amazon's IAM (Identity Access Management) to make PUT-only credentials that are restricted to a single bucket. This allows you to leave the credentials on the server (for automation) while mitigating the potential damage if they're compromised. You should deny the GET and DELETE permissions. This allows your server to send backups but not retrieve or remove them. You can perform those actions through Amazon's Web Console, or through a separate set of recovery credentials.
-
Keep rolling backups by using timestamps in the S3 directory structure (as above) to save different versions of your data. You'll have access to daily, weekly, and monthly historical versions of your backups. This is important if a worker accidentally deletes important data and it takes a few days for anyone to notice. If you overwrite your off-site backups then you lose the ability to do point-in-time recovery. With rolling backups you can restore an older copy of your data into a new database and copy the missing information over to your live database. This also helps protect you against issues like corruption (or low disk space) that may affect the integrity of your latest backup.
Using AWS CLI to send incremental filesystem backups to S3
You can also use aws to send incremental filesystem backups to S3 (just like rsync).
Usage:
aws s3 sync --exclude "tmp/*" \
  /path/to/cerb/storage/ s3://yourbucket/cerb/storage/
Using Amazon's Web Console
You can also manage your data in S3 by using Amazon's web-based management interface. Log in and click S3 in the Services menu. After selecting your bucket on the left you should see a list of your directories and files.